Childhood and summertime seem to go hand in hand. With no school and longer daylight hours, that means spending more time outdoors. But with so many things competing for your kid’s attention—especially if you’ve relaxed screen time rules—going out to play may not seem as common as it once was.
Instead of focusing on elaborate ways to coax your little ones into the backyard, think of adapting a back-to-basics mentality. Below are some fun ways to help you recreate your own childhood experience and enjoy the best of summer with your kids before September rolls around.
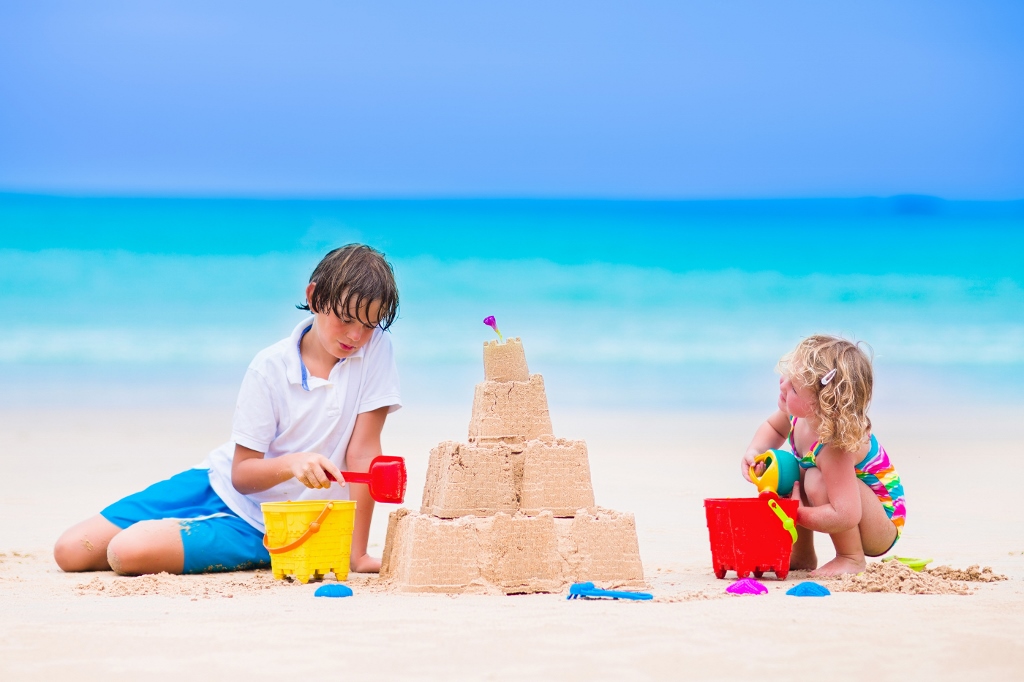
Building a Sandcastle
A day at the beach is not complete without making a sandcastle. While the ingredients (sand and water) haven’t changed, the approach has. “Don’t use pails or the plastic forms that are shaped like a castle,” advises Sandi Adams, founder of SandiCastles (www.Sandicastles.com). “The science is against you when you try this method, which is why we have all struggled with it since we were kids.” Instead, she recommends using any kind of container that you can cut the bottom off of (yogurt/cottage cheese cup, soup can, bucket, etc.) or that is already open on both ends (like a PVC pipe). Next, put several inches of sand, add water and tap the container until the water makes the top of the sand even and flat. Add several inches of sand and water and repeat until you are an inch or so from the top. Finally, carefully lift the container up and off, and voila! Packed sand that is ready to carve.
For beginning sand sculptors, Adams suggests using a model for inspiration. “I recommend either printing or drawing a cartoon of an animal or character you’d like to try or bringing a statue or toy,” she says. “It is easier to carve something you can look at for reference than try to remember in your head what it looks like.”
The only tools you’ll need can be found around the house: a plastic knife, brush, trowel, spoon or fork. “I have found that using utensils to carve sand works best with children ages 7 and older,” adds Adams. Younger kids can get involved by helping pour water, selecting shells for decorating and finishing off the sand around the sculpture by making handprints or footprints.
Catching Fireflies
The glow cast by a backyard full of lighting bugs, as they have affectionately been called, is something that every child should experience at least once in their lives. Like building a sandcastle, a few common household items are all that’s required. “Catching fireflies is relatively simple and requires only a butterfly net, some patience and something to observe them in, such as a mason jar with a lid pierced for ventilation,” says Brett Ortler, nature lover and author of The Fireflies Book (www.BrettOrtler.com).
While kids may be tempted to chase after and handle the fireflies, it’s best to watch them land first. Then coax them into a jar using a net, invert the jar and cover it. “Don’t keep a firefly trapped in a jar for too long, as it stresses them and can dry them out,” he cautions. Ideally, you can watch them for a few minutes and then let them go. Adding a wet, crumpled paper towel can help them from drying out as you observe them. “Most fireflies live only a short time (a matter of weeks), so it’s best not to interfere as much as possible,” adds Ortler. The best places for spotting fireflies are in undeveloped ponds, rivers and lakes, but don’t rule out your own neighborhood. “City parks and green spaces in urban areas will often have fireflies, and even your average suburban backyard will boast a firefly or two going from place to place,” he says.
Skipping a Stone
What kid can resist the placid calm of still waters? Just right for stone skipping! To throw a rock like a pro, Ortler recommends a flat, round or oval stone, about one-third the size of your hand. The optimal setting is the stillest water possible. “Any surface activity [like] waves will slow down your stone and impede its progress,” he notes. “A lake or wide pond with no waves and no wind is the best environment possible.”
As far as mastering your technique, be sure to throw your stone quickly and at a narrow angle. “You also want to spin the rock with your finger as you throw it. Perfecting this, of course, takes a lot of practice. But it’s definitely fun to set your own records,” Ortler says.
Making S’mores
Whether or not you’ll camping outdoors this summer, you don’t need an excuse to toast marshmallows and create a classic, kid-friendly dessert. Once you get your campfire going, assemble the traditional s’mores ingredients (graham crackers, chocolate squares and marshmallows) and get the kids involved in the prep. “I like to break the graham crackers in half, so they’re s’more-sized and ready to go, and then break the chocolate bars into similarly-sized pieces—all great kid activities,” says Molly Birnbaum, editor in chief of America’s Test Kitchen Kids and editor of The Complete Cookbook for Young Chefs (www.americastestkitchen.com/kids/grownups).
Kids can also place marshmallows on long sticks and position them over the fire, as an adult supervises. How long the marshmallows roast depends on personal preference—something with which Birnbaum says kids can experiment. “It can take anywhere from 10 seconds (if you go for burnt and just stick it straight in the flame), to 5 minutes (if you hold the marshmallow an even distance away from the flame and rotate it until it’s golden brown along all sides),” she says.
If your kid isn’t a fan of chocolate or has food allergies, Birnbaum suggests substituting almond butter, sun butter or raspberry jam. Gluten-free graham crackers are another option, or better yet, toasted marshmallows on their own.
Happy summer!